
Blog
Balisong Tricks: A Safe Guide to Butterfly Knife Flipping, Terminology, and Practice

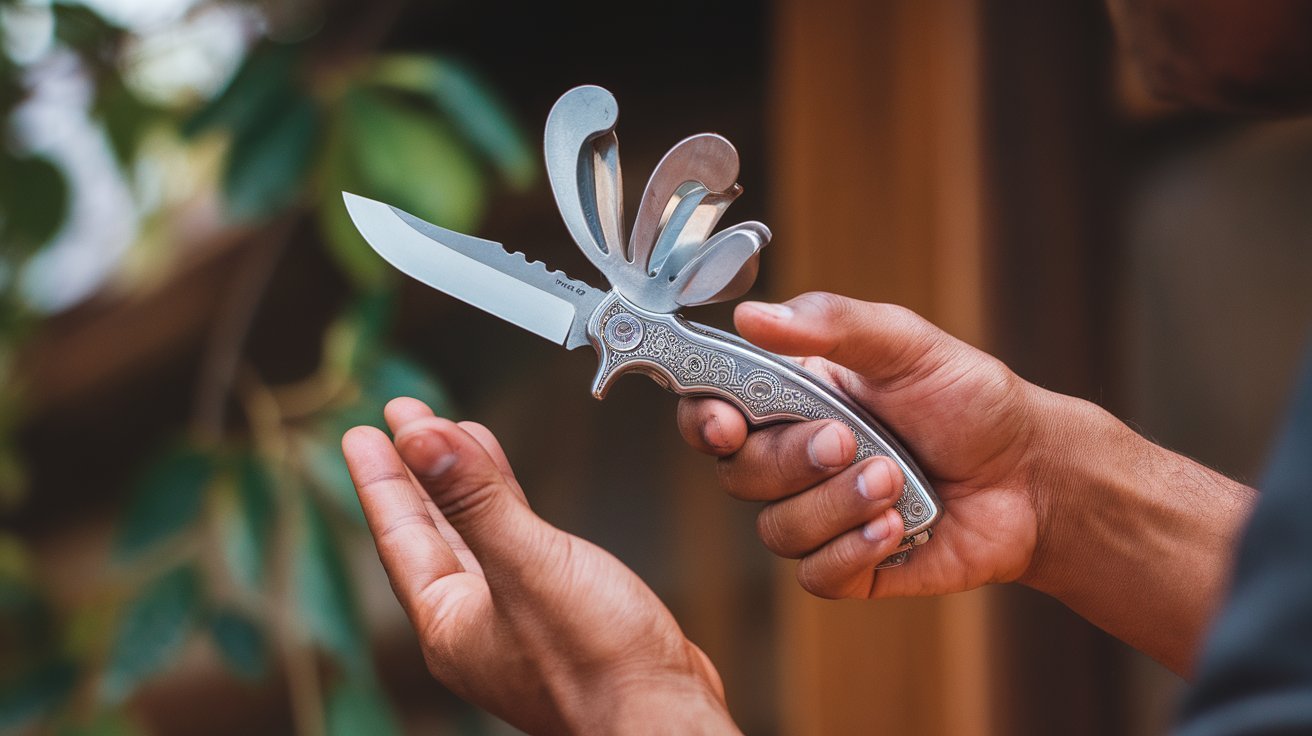
Balisong tricks are often associated with the fast, flowing movements seen in demonstrations, competitions, films, and online videos. A balisong, commonly called a butterfly knife, has a distinctive two-handle construction that allows the handles to rotate around the blade. This design has made balisong manipulation a recognizable skill and a popular subject among collectors and enthusiasts. At the same time, a balisong contains a sharp blade and can cause serious injury when handled carelessly, so responsible learning begins with safety, legal awareness, and controlled practice rather than speed.
This guide explores the world of balisong tricks from a safety-conscious perspective. We will cover the terminology commonly used by enthusiasts, explain the different categories of manipulation, discuss safer ways to approach the hobby, and look at why these movements require coordination, patience, and discipline.
What Are Balisong Tricks?
Balisong tricks are controlled manipulation movements involving the handles of a butterfly knife. In demonstrations, the handles may appear to rotate, swing, or change position rapidly while the person maintains control of the object. Experienced performers can make these movements look effortless, but the apparent simplicity often comes from extensive repetition and precise hand coordination.
The term balisong flipping is frequently used to describe this broader style of manipulation. Some enthusiasts approach it as a form of dexterity practice, while others are interested primarily in the mechanical design of balisongs. Collectors may also appreciate the craftsmanship, handle construction, pivots, materials, and overall engineering of different models.
It is important to distinguish performance manipulation from practical knife use. Learning about the terminology and culture surrounding balisongs does not require treating the knife as a toy. Because an actual balisong has a blade, responsible enthusiasts should prioritize methods and equipment that minimize the possibility of cuts or other injuries.
Understanding Common Balisong Trick Terminology
The balisong community uses a specialized vocabulary to describe different movements and concepts. Understanding these terms can make instructional discussions, demonstrations, and enthusiast communities easier to follow.
Opening and closing movements generally refer to actions that change the position of the handles relative to the blade. Flipping is a broad term for manipulating the handles through controlled rotational movement. Transitions describe movements that connect one position or sequence to another, while combos generally refer to several movements linked together into a continuous performance.
Another important distinction is between the safe handle and the bite handle. On many traditional balisongs, one handle can place the cutting edge in a dangerous position relative to the hand. This terminology exists precisely because the orientation of the blade matters. Understanding this concept is more important than memorizing a long list of tricks because it highlights the fundamental safety risks involved.
Terminology can vary between communities, manufacturers, and individual performers, so names should not always be assumed to have a universal meaning.
Why Balisong Manipulation Requires Skill
What looks like a simple spinning motion can require considerable hand-eye coordination, timing, finger control, and spatial awareness. The handles move independently around a pivot system, meaning that small changes in hand position can significantly alter the movement.
Successful manipulation also depends on consistency. A performer needs to understand where the handles are moving without relying entirely on visual attention. This is one reason experienced demonstrations can appear remarkably smooth.
However, speed should not be considered the primary measure of skill. Control and awareness are more important than fast movement. Attempting to imitate an advanced performance immediately can increase the possibility of losing control, particularly when using a live blade.
For people interested in the dexterity aspect of balisong flipping, purpose-built trainer versions are a considerably safer starting point. Trainers are designed for manipulation practice without presenting the same cutting hazard as a sharpened blade, although they can still cause impact injuries if used recklessly.
Safety Should Come Before Learning Tricks
The most important part of exploring balisong tricks is establishing a safe environment. We should never treat a bladed object as a casual toy, and we should avoid practicing around other people, pets, fragile objects, or crowded spaces.
A responsible approach includes checking the local laws and regulations before purchasing, carrying, transporting, or practicing with a balisong. Knife laws can differ substantially between countries, states, provinces, and municipalities. Ownership and public carry may also be treated differently, so assumptions based on another location can be misleading.
For manipulation practice, a blunt trainer is preferable to a sharpened knife. We should also use an uncluttered area and avoid practicing when distracted, tired, impaired, or under pressure to perform.
Protective equipment can reduce some risks, but it should never create a false sense of security. The safest strategy is to remove the cutting hazard from practice whenever possible.
Popular Categories of Balisong Tricks
The world of balisong manipulation contains many different categories of movements. Rather than focusing on operational instructions, we can understand them conceptually.
Basic rotations involve controlled changes in the orientation of the handles. They are often visually simple but provide the foundation for more complex sequences.
Transitions connect separate movements. A performer may move from one handle position to another through a smooth change in direction. Good transitions are an important part of creating a fluid performance.
Aerial-style movements are visually dramatic because the object briefly moves independently of a firm grip. These movements are significantly less forgiving when performed with a sharp blade, making them inappropriate for casual practice with a live balisong.
Combo sequences combine multiple movements into a continuous routine. Advanced performers may develop distinctive combinations that emphasize rhythm, precision, and visual flow.
For anyone interested in learning the art rather than handling a real blade, we recommend studying demonstrations with trainer equipment and treating advanced movements as performance skills rather than practical knife techniques.
How to Approach Balisong Tricks Responsibly
A responsible learning process emphasizes gradual development rather than immediately attempting complicated movements. We can begin by learning the terminology, understanding how the handles and pivot system work, and becoming familiar with the risks associated with the blade.
A trainer balisong allows enthusiasts to explore coordination and movement without introducing the same sharp-edge hazard. It is still important to understand that trainers can pinch fingers or cause impact injuries.
Slow, controlled practice is preferable to trying to copy a fast video frame by frame. We should focus on awareness of the object’s position and maintain sufficient space around us. If a movement becomes uncontrolled, the appropriate response is to stop rather than attempt to recover it dramatically.
It is also useful to remember that online demonstrations may not show every safety precaution. Professional performers can have extensive experience, specialized equipment, and carefully controlled environments that are not obvious in a short video.
Balisong Tricks as a Dexterity and Collecting Hobby
Beyond flipping itself, the balisong world includes knife collecting, mechanical design, craftsmanship, customization, and historical interest. Enthusiasts may compare handle materials, pivot systems, balance, construction quality, and manufacturing techniques.
The mechanical side can be especially interesting because the two handles must move smoothly around their pivots while remaining stable enough for controlled manipulation. Different designs can produce noticeably different handling characteristics.
For collectors, historical and cultural context can also be important. The balisong has a long association with the Philippines and has become internationally recognizable through popular culture, competitive manipulation, and knife-collecting communities.
Approaching the hobby through design, history, safe trainers, and dexterity can provide much of the fascination without encouraging unnecessary risk.
Final Thoughts on Balisong Tricks
Balisong tricks combine mechanical movement, coordination, timing, and visual performance. Although experienced flippers can make complicated sequences look effortless, the presence of a sharp blade means that safety should always remain the priority.
We can appreciate the artistry behind butterfly-knife manipulation while recognizing that a real balisong is a potentially dangerous tool. Learning terminology, studying demonstrations, understanding local laws, and practicing dexterity with an appropriate trainer provide safer ways to explore the subject.
The best approach is not to chase speed or increasingly risky movements. Instead, we should value control, awareness, responsible equipment, and disciplined practice. For enthusiasts interested in the hobby, those principles create a much stronger foundation than attempting advanced tricks with a live blade.
Frequently Asked Questions About Balisong Tricks
Are balisong tricks difficult to learn?
They can be challenging because they require coordination, timing, and precise control. More complex sequences generally require substantial practice.
What is the safest way to practice balisong manipulation?
A purpose-built trainer balisong without a sharpened cutting edge is generally safer than practicing with a live blade. It should still be handled responsibly because impact and pinch injuries remain possible.
Are balisongs legal everywhere?
No. Laws vary by jurisdiction and can address ownership, possession, transportation, and carrying separately. We should check the applicable local regulations before acquiring or carrying one.
Why are balisongs also called butterfly knives?
The nickname comes from their distinctive two-handle construction, which visually resembles butterfly wings when the handles are opened or moved apart.
Are advanced flipping movements safe with a real knife?
Using a sharpened blade introduces significant cutting risk. Advanced manipulation should not be treated as a casual activity, and safer trainer equipment is preferable for learning dexterity-based movements.
What matters more in balisong flipping: speed or control?
Control matters more than speed. Smooth, predictable movement and awareness are more valuable than attempting fast sequences before developing the necessary coordination.
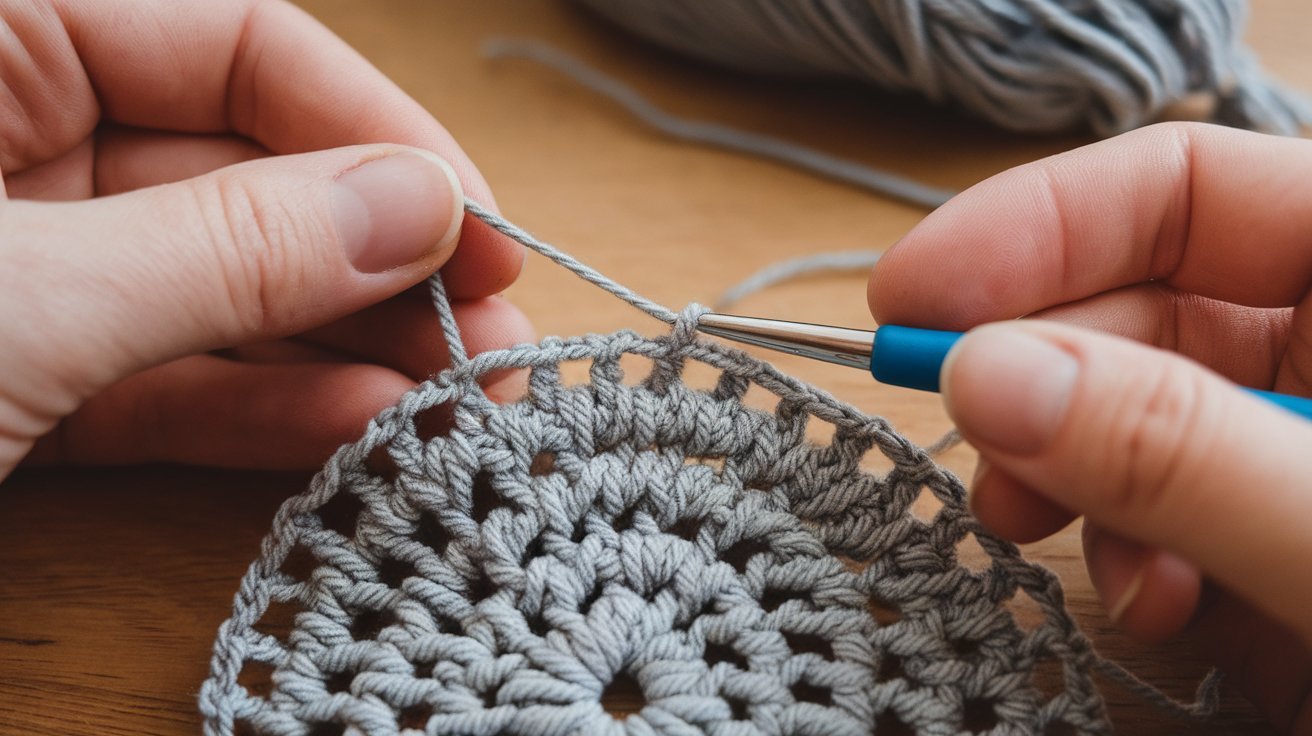
Learning how to crochet a circle is one of the most useful foundational skills for anyone interested in crochet. Circular shapes appear in countless projects, including hats, coasters, baskets, bags, blankets, amigurumi, rugs, placemats, and decorative motifs. Once we understand how increases work in a round, we can create circles that remain flat, even, and symmetrical rather than curling into a bowl or developing unwanted waves.
The good news is that crocheting a circle does not require complicated techniques. We mainly need to understand the magic ring, starting stitches, increases, stitch counting, and joining rounds. With consistent tension and a simple increase pattern, we can build a neat circle in almost any yarn and crochet hook size.
What We Need Before Learning How to Crochet a Circle
Before starting, we should gather a few basic supplies. The most important items are yarn and an appropriately sized crochet hook. Beginners often find medium-weight yarn easier to work with because the individual stitches are large enough to see clearly. A smooth, light-colored yarn can also make counting stitches considerably easier.
A stitch marker is extremely useful, especially when working continuously in the round. We may also want a yarn needle and scissors for finishing the project.
The exact hook size depends on the yarn label and the desired result. For a firm circle, such as a coaster or basket base, a slightly tighter tension may be useful. For softer decorative projects, a more relaxed tension can produce a different texture.
We should become comfortable with a few basic crochet terms before beginning: chain stitch, single crochet, slip stitch, double crochet, increase, round, and stitch count. The instructions below use standard US crochet terminology.
How to Crochet a Circle With a Magic Ring
One of the most popular ways to begin a crochet circle is with a magic ring, sometimes called a magic circle. It creates an adjustable center that can be pulled closed, leaving a small or nearly invisible hole.
To begin, make a loop with the yarn and work the required stitches around the loop. Keep the working yarn accessible and avoid pulling the center closed until the first round is complete. Once the stitches have been made, gently pull the yarn tail to tighten the center.
For a basic single crochet circle, we can start with approximately six single crochet stitches in the magic ring. The exact number can vary depending on the pattern, yarn, and stitch being used.
After completing the first round, we need to understand the most important principle of circular crochet: increases must be distributed evenly. If we simply add stitches randomly, the circle can become uneven or develop corners.
A typical sequence for single crochet is:
- Round 1: 6 single crochet stitches into the center
- Round 2: 2 single crochet stitches in each stitch
- Round 3: 1 single crochet, then an increase, repeated around
- Round 4: 2 single crochet, then an increase, repeated around
- Round 5: 3 single crochet, then an increase, repeated around
This pattern continues by adding one regular stitch between increases with each new round.
Understanding Crochet Increases
The key to learning how to crochet a circle is understanding the increase. An increase means working two stitches into the same stitch. This adds one additional stitch to the round.
For example, if a round begins with 6 stitches, the next round can contain 12 stitches because we place two stitches into each of the six original stitches. The following round can contain 18 stitches when we alternate one regular stitch with one increase.
This predictable increase pattern helps distribute the additional stitches around the circumference. When the increases are spaced correctly, the work tends to remain flat.
If the circle begins curling upward, we may not be adding enough stitches for our yarn, hook, and tension combination. If the outer edge becomes wavy or ruffled, we may be adding too many stitches.
This makes stitch counting particularly important. Rather than estimating the number of stitches by appearance, we should count each round carefully. A stitch marker can help identify the beginning of every round.
How to Crochet a Circle Without a Magic Ring
Although the magic ring is popular, it is not the only way to start a circle. Beginners who find it difficult can use a chain-ring method.
We can begin by making a small chain and joining it into a ring with a slip stitch. The first round of stitches is then worked into the center of that chain ring.
This method is often easier to understand because the starting structure is straightforward. However, it can leave a slightly larger center hole than an adjustable magic ring.
For projects where the center will be covered, decorated, or filled, this may not matter. For amigurumi and other projects where a tightly closed center is desirable, the magic ring can provide a cleaner result.
The choice therefore depends on the project and personal preference. Both techniques can produce a successful circular foundation.
How to Keep a Crochet Circle Flat and Even
One of the most common beginner questions is why a crochet circle does not remain flat. The answer usually involves stitch increases and tension.
If the work resembles a bowl, we may need more increases. If the edge looks ruffled, we may have too many increases. If the circle looks more like a polygon than a smooth circle, the increase placement may be too concentrated in particular areas.
Consistent tension is equally important. Pulling some stitches tightly while making others loosely can cause an irregular edge.
We should also make sure we are inserting the hook into the correct part of each stitch. Missing a stitch can reduce the total stitch count and cause the circle to narrow unexpectedly.
When changing yarn or hook size, we should expect the ideal increase rate to change slightly. Different crochet stitches also require different approaches. Single crochet, half double crochet, and double crochet circles do not necessarily use identical increase formulas.
Common Mistakes When Crocheting a Circle
Beginners can encounter several predictable problems. One of the most common is losing track of the stitch count. Even one missed increase can affect the shape of subsequent rounds.
Another common mistake is accidentally placing an increase in the wrong stitch. Since an increase requires two stitches in one location, it is easy to lose track when working quickly.
We may also accidentally work into a turning chain or mistake the chain for a regular stitch, depending on the pattern structure. Reading the instructions carefully and using a stitch marker can prevent many of these problems.
Tension is another major factor. If our hands tighten as we work, later rounds may become smaller and less flexible. Taking short breaks can help maintain consistent movement.
Finally, we should avoid judging the project after only one or two rounds. Small irregularities can become less noticeable as additional rounds are completed, especially when the overall increase pattern is correct.
Where We Can Use Crochet Circles
Once we understand how to crochet a circle, we can use the technique as the foundation for many projects. Simple flat circles can become coasters, placemats, table decorations, rug components, basket bases, and motifs.
Crochet circles are also essential in three-dimensional projects. Amigurumi patterns frequently begin with a circular base before increasing or decreasing to create a rounded shape. Hats can use circular rounds to build the crown before continuing toward the sides.
We can also experiment with color changes. Alternating colors between rounds creates stripes, while changing colors at specific points can produce geometric patterns.
A simple circle can therefore become much more than a practice exercise. It is a building block for countless crochet designs.
Final Thoughts on How to Crochet a Circle
Understanding how to crochet a circle gives us a foundation for many beginner and advanced crochet projects. The central ideas are simple: start with a secure center, work consistent stitches, distribute increases evenly, and monitor the stitch count.
The magic ring provides a neat adjustable center, while the chain-ring method offers a straightforward alternative. As we work additional rounds, we should pay attention to the shape. A flat circle generally indicates that the increase rate and tension are working well.
With practice, counting stitches becomes easier and our tension becomes more consistent. Once the basic circular structure feels natural, we can experiment with different stitches, yarn weights, colors, and project types.
Frequently Asked Questions
How many stitches should we start with when crocheting a circle?
A common starting point for a single crochet circle is six stitches, although the ideal number can vary depending on the stitch and pattern.
Why is my crochet circle curling?
Curling can indicate that the circle needs more increases, although tight tension or the specific yarn and hook combination can also contribute.
Why is my crochet circle wavy?
A wavy edge often means there are too many increases for the particular stitch, yarn, hook, or tension being used.
Is a magic ring necessary for crochet circles?
No. We can also begin with a small chain joined into a ring. The magic ring simply provides a convenient way to create an adjustable center.
How do we make a crochet circle bigger?
Continue working additional rounds while maintaining an appropriate increase pattern. For single crochet, a common approach is to add another regular stitch between increases in each successive round.
Can beginners learn how to crochet a circle?
Absolutely. A circle is an excellent beginner project because it teaches several fundamental skills, including increases, stitch counting, tension control, and working in rounds.
What can we make from a crochet circle?
Crochet circles can become the foundation for coasters, hats, bags, rugs, baskets, amigurumi, blankets, placemats, and decorative motifs.
When someone asks “How big is 11 inches?”, they are usually looking for an easy way to visualize a measurement. Numbers can be difficult to picture without a familiar object for comparison, so understanding 11 inches in real life can be much easier when we compare it with everyday items.
11 inches equals 27.94 centimeters, which is just under 28 centimeters. It is also approximately 0.917 feet, or about 0.3056 yards. In practical terms, 11 inches is a moderate length that is easy to visualize using common household objects, paper, books, tablets, and other familiar items.
Whether we are measuring furniture, checking product dimensions, comparing screen sizes, working on a craft project, or simply trying to understand a measurement, knowing what 11 inches looks like can make the number much more meaningful.
How Long Is 11 Inches in Centimeters and Other Measurements?
The first step in understanding 11 inches is converting it into other familiar measurement systems.
11 inches = 27.94 centimeters.
For additional comparisons:
- 11 inches = 27.94 cm
- 11 inches = 279.4 millimeters
- 11 inches = 0.9167 feet
- 11 inches = approximately 0.3056 yards
- 11 inches = approximately 0.2794 meters
Because 28 centimeters is a relatively familiar measurement, we can think of 11 inches as being just slightly shorter than a 30-centimeter ruler.
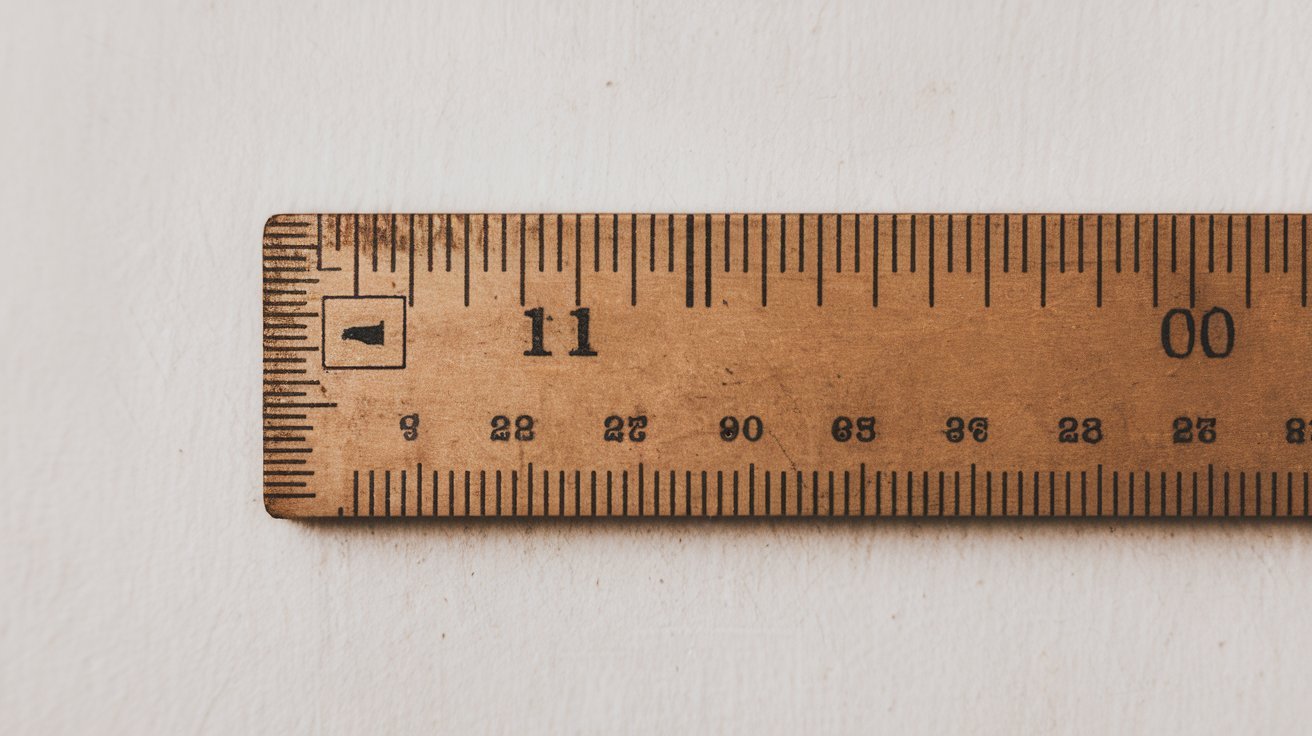
A standard school or office ruler is commonly around 12 inches long, meaning 11 inches is only about one inch shorter than a typical 12-inch ruler. This makes a ruler one of the easiest ways to visualize the measurement.
If we have a standard 12-inch ruler available, simply looking at the ruler and stopping one inch before the end gives us a very accurate mental picture of 11 inches.
What Does 11 Inches Look Like Compared With Everyday Objects?
Everyday objects are useful for understanding measurements without physically measuring them.
One of the simplest comparisons is a standard sheet of U.S. letter paper, which measures 8.5 × 11 inches. The longer side of letter-size paper is exactly 11 inches. Therefore, if we have a standard sheet of printer paper, its longest edge gives us a precise example of how long 11 inches is.
A typical 12-inch ruler is another useful comparison. Since 11 inches is only one inch shorter, the difference is small and easy to see.
Other objects can provide approximate comparisons, although their dimensions vary by model:
- A large tablet may have a screen around 11 inches diagonally.
- A medium-sized book can have a height close to 11 inches.
- Some laptop or tablet displays use dimensions that make 11 inches a familiar screen measurement.
- A large kitchen utensil or serving item may be close to 11 inches long.
- Some decorative objects and household tools can measure around 11 inches.
The important point is that an 11-inch measurement is longer than a typical smartphone but shorter than a standard foot-long ruler.
Is 11 Inches Big for a Screen?
The answer depends on what type of screen we are discussing. When manufacturers describe a tablet or laptop as having an 11-inch display, the measurement usually refers to the diagonal distance across the screen, not the width or height.
This distinction is important.
An 11-inch screen does not mean that the device is 11 inches wide. Instead, the diagonal measurement from one corner of the display to the opposite corner is 11 inches.
For example, an 11-inch tablet can have a screen that is roughly rectangular, with its width and height determined by the device’s aspect ratio. A display with a 16:10 aspect ratio will have different dimensions from a display with a 4:3 ratio, even though both can have an 11-inch diagonal.
Therefore, when shopping for an 11-inch tablet or laptop, we should check the manufacturer’s listed width, height, and thickness if the physical size of the device matters.
How Big Is 11 Inches Compared With 10 and 12 Inches?
Comparing nearby measurements can make 11 inches even easier to understand.
10 inches is approximately 25.4 centimeters, while 11 inches is 27.94 centimeters. This means 11 inches is exactly one inch longer than 10 inches.
Meanwhile, 12 inches equals 30.48 centimeters. Therefore, 11 inches is exactly one inch shorter than 12 inches.
The comparison looks like this:
| Measurement | Centimeters |
|---|---|
| 10 inches | 25.4 cm |
| 11 inches | 27.94 cm |
| 12 inches | 30.48 cm |
The difference between 10, 11, and 12 inches may sound small, but it can become important when measuring furniture, shelves, screens, clothing, packaging, or available storage space.
An 11-inch object is therefore best thought of as being almost one foot long.
How Big Is 11 Inches in Real Life?
If we want the simplest mental image, we can think of 11 inches as nearly the length of a standard foot.
A human foot is not literally the same size for everyone, so it is not an exact measuring tool. However, 11 inches is close enough to one foot that the comparison can provide a rough visual reference.
A standard letter-size piece of paper provides an even better comparison because its long side is exactly 11 inches. Place the paper vertically on a flat surface, and the distance from the top to the bottom is exactly 11 inches.
Another useful reference is a 12-inch ruler. Imagine removing the final one-inch section from the ruler. The remaining length is 11 inches.
These comparisons make it easier to visualize 11 inches without needing mathematical calculations.
Where Is an 11-Inch Measurement Commonly Used?
An 11-inch measurement appears in many everyday situations. It can describe paper dimensions, electronic screens, books, kitchen equipment, furniture components, craft materials, packaging, and household objects.
For example, U.S. letter-size paper is 8.5 × 11 inches, making 11 inches one of the most familiar dimensions in offices, schools, and homes.
In technology, 11-inch displays are common among certain tablets and compact computing devices. In these cases, however, the 11-inch specification usually refers to screen diagonal rather than the device’s longest physical side.
In crafts and DIY projects, knowing how long 11 inches is can also help when cutting fabric, wood, ribbon, wire, paper, or other materials.
When accuracy matters, we should always use an actual measuring device rather than estimating from an object comparison.
Easy Ways to Measure 11 Inches Without a Ruler
If we do not have a ruler available, several familiar references can help us estimate the distance.
The easiest method is to use letter-size printer paper if we are in the United States or using the U.S. paper standard. Its long side is exactly 11 inches.
We can also use a 12-inch ruler and mark the point one inch before the end. For an approximate measurement, we can compare the distance with the length of a typical adult foot, although this will vary considerably from person to person.
For precise measurements, however, an inexpensive measuring tape or ruler is the best option. This is particularly important when the measurement affects construction, furniture fitting, product dimensions, or other projects requiring accuracy.
Conclusion: So, How Big Is 11 Inches?
So, how big is 11 inches? It is 27.94 centimeters, or just under 28 centimeters. It is also approximately 0.917 feet, making it just one inch shorter than a full foot.
The easiest real-world comparison is a standard U.S. letter-size sheet of paper, whose longer side measures exactly 11 inches. Another excellent reference is a 12-inch ruler, where 11 inches is simply one inch short of the full length.
Whether we are thinking about a tablet screen, paper, furniture, books, crafts, or everyday objects, 11 inches represents a moderate length that is easy to visualize once we connect it with familiar items.
Frequently Asked Questions About 11 Inches
How many centimeters is 11 inches?
11 inches equals 27.94 centimeters, which is just under 28 cm.
Is 11 inches almost a foot?
Yes. One foot equals 12 inches, so 11 inches is exactly one inch shorter than a foot.
What household item is exactly 11 inches long?
A standard U.S. letter-size sheet of paper is 11 inches along its longer side, making it one of the easiest exact comparisons.
How big is an 11-inch tablet?
An 11-inch tablet typically refers to a screen measured diagonally from corner to corner. Its actual width and height depend on the screen’s aspect ratio and design.
Is 11 inches bigger than 10 inches?
Yes. 11 inches is exactly one inch longer than 10 inches, which equals 25.4 cm.
How does 11 inches compare with 12 inches?
11 inches is one inch shorter than 12 inches. In centimeters, 11 inches is 27.94 cm, while 12 inches is 30.48 cm.
Can we estimate 11 inches without a ruler?
Yes. A standard letter-size sheet of paper provides an exact 11-inch reference along its longest side. For precise work, however, an actual ruler or measuring tape should be used.
Blog
From TurboGeek.org Blog: A Complete Guide to Its Technology, Gaming, and Practical Content in 2026

From TurboGeek.org blog is a useful phrase for readers searching for the site’s technology guides, gaming coverage, gadget discussions, programming material, and practical digital advice. TurboGeek describes itself as a destination for gaming and gadgets, while its current homepage presents a broader mix of gaming, programming, technology updates, guides, software insights, and digital trends.
The website has developed a broad editorial identity rather than concentrating on only one technology category. Visitors can find material related to video games, hardware, software, programming, AI, cybersecurity, networking, electronics, and digital culture. Its current content also includes practical how-to articles designed to help readers solve everyday technology problems.
For anyone discovering the site in 2026, understanding its categories and editorial approach makes it easier to find useful material without having to browse every article individually.
What Is TurboGeek.org Blog?
TurboGeek.org is an online technology and gaming publication that combines entertainment-focused coverage with practical technology information. According to its About page, the site began as a passion project created by friends interested in gaming and technology and later developed into a broader digital platform.
Its stated focus includes gaming culture, video games, gadgets, technology news, reviews, and in-depth features. The site says it aims to serve both casual gamers and technology enthusiasts who want to keep up with new developments.
The current homepage expands that scope. It describes TurboGeek as a source for gaming trends, programming insights, technology news, practical guides, software information, and digital trends.
This combination makes the site relevant to readers with different interests. Someone visiting for a game guide may also find programming or gadget content, while a developer may encounter articles about gaming technology or emerging digital tools.
Main Topics Covered From TurboGeek.org Blog
The site’s content can broadly be divided into several areas.
Gaming is one of TurboGeek’s most visible subjects. Current articles include discussions of strategy games, action RPGs, AI in video-game character creation, and gaming-related technology. The homepage, for example, currently features articles concerning Arknights, Path of Exile 2, Diablo 4, and AI-assisted character creation.
Technology and gadgets form another major area. Readers can encounter explanations of emerging technologies, software tools, digital services, hardware, and practical computing subjects.
Programming and maker technology are also represented. A TurboGeek guide describes content involving microcontrollers, Linux, networking, electronics, single-board computers, FPGA topics, and power electronics, particularly for makers and hobbyists.
The site also publishes broader technology explainers and how-to guides, allowing readers to move from general concepts to practical solutions.
Gaming Content and Digital Entertainment
Gaming remains central to TurboGeek’s identity. The website’s About page specifically describes its mission around video games and gaming culture, including coverage of both independent games and major AAA releases.
Its current Game Geek section demonstrates the breadth of this approach. Articles discuss strategy games, action RPGs, online gaming, and the relationship between artificial intelligence and game development.
This type of coverage can appeal to readers who want more than basic game news. Comparisons, explainers, and analysis can help players understand why a particular game works, how different systems compare, or how technology is changing game development.
For example, a comparison between Path of Exile 2 and Diablo 4 approaches gaming from a consumer perspective, while an article about AI character creation examines the technology behind modern game development.
Practical Technology Guides for Everyday Users
One of the strongest features of TurboGeek.org blog is its practical orientation.
A recent guide describes TurboGeek as offering hands-on material covering Linux tools, electronics projects, microcontrollers, networking, and DIY technology. It highlights parts lists, wiring information, commands, troubleshooting suggestions, and alternative solutions.
This approach can be especially useful for readers who do not simply want to read about technology but want to do something with it.
Practical technology content is valuable because technical subjects can often seem complicated when explained only through theory. Step-by-step instructions make it easier to understand what needs to be installed, configured, tested, or changed.
The site also publishes guides for general web users. A 2026 article, for example, covers online privacy, cybersecurity, AI-assisted browsing, password managers, multifactor authentication, browser extensions, cloud synchronization, translation, and accessibility tools.
TurboGeek.org for Developers, Makers, and Tech Enthusiasts
TurboGeek is not limited to casual technology readers. Its content also targets people who enjoy building, programming, troubleshooting, and experimenting.
The site’s maker-focused material includes subjects such as Linux, microcontrollers, electronics, networking, and single-board computers. The site describes its audience as makers, hobbyists, hardware hackers, educators, and technically minded readers.
This is particularly useful for intermediate users who already understand basic computing concepts and want practical projects to work on.
Programming content can also provide a bridge between theory and implementation. Rather than treating software development as an abstract subject, practical guides can demonstrate how tools and techniques are applied to real projects.
For beginners, the best approach is to start with introductory guides before moving into more advanced technical material. Readers should also verify commands and configurations against current documentation before using them on important systems.
How to Navigate the TurboGeek Blog Efficiently
The growing number of articles on TurboGeek can make navigation challenging, particularly for first-time visitors. The site’s categories provide a useful starting point.
The Tech Geek category currently includes articles about technology tips, maker projects, digital tools, travel-related technology, privacy, gaming, and other subjects.
Readers can begin by identifying their objective. Someone looking for a quick solution should search for a how-to or troubleshooting guide, while someone researching a technology trend may benefit more from an explanatory or analytical article.
It is also worth checking the publication date, particularly for software, cybersecurity, hardware, and AI-related topics. Technology changes quickly, and instructions that worked previously may not always remain accurate.
For practical projects, readers should pay attention to requirements, compatibility information, source links, and troubleshooting sections before beginning.
Editorial Style and Content Approach
The available TurboGeek material generally emphasizes clear explanations, practical advice, and accessible language. One article describing the site’s editorial approach says its writers focus on readers first, use straightforward language, and organize posts with descriptive headings and useful outcomes.
Another article describes the site’s approach as direct and practical, with content formats including short explainers, longer guides, comparisons, video walkthroughs, and downloadable resources.
This variety is useful because readers have different information needs. A beginner may need a short explanation, whereas an experienced user may want a detailed technical walkthrough.
The website also encourages community participation and contributions, according to its published editorial material.
Why TurboGeek.org Matters in 2026
Technology is changing quickly, making practical digital information increasingly valuable. Artificial intelligence, cybersecurity, gaming technology, cloud systems, programming tools, and connected devices are influencing everyday life as well as professional work.
TurboGeek’s broad coverage allows readers to explore several of these areas through one website. Its gaming content connects entertainment with technology, while its maker guides connect software with physical hardware.
The site’s emphasis on practical information is particularly relevant in 2026 because readers increasingly want technology advice they can understand and apply, rather than highly technical explanations with little practical value.
At the same time, users should evaluate individual articles according to their date, evidence, author information, and relevance to their specific situation. A technology blog can be a useful starting point, but important security, financial, legal, or technical decisions may require confirmation from primary documentation or qualified professionals.
Conclusion
From TurboGeek.org blog, readers can discover a broad range of material covering gaming, gadgets, programming, technology, AI, cybersecurity, software, electronics, and practical how-to guides. The site’s own description emphasizes its origins in gaming and technology enthusiasm, while its current content demonstrates a considerably wider editorial scope.
For gamers, TurboGeek provides game-focused analysis and technology coverage. For makers and developers, its practical material includes subjects such as Linux, networking, microcontrollers, and electronics. For everyday users, its technology guides address areas such as privacy, online security, digital tools, and device performance.
The best way to use the website in 2026 is to treat it as a practical starting point for learning and exploration, while checking publication dates and authoritative documentation whenever technology changes rapidly.
Ultimately, TurboGeek’s greatest strength is the connection between technology and practical use. Whether the goal is discovering a new game, understanding an emerging technology, troubleshooting a device, or experimenting with a DIY project, the blog offers a varied collection of material for curious digital users.
Frequently Asked Questions
What is TurboGeek.org?
TurboGeek.org is a website focused on gaming, gadgets, technology, programming, and practical digital information. Its About page describes it as a platform created around an interest in gaming and technology.
What topics does the TurboGeek blog cover?
The site covers gaming, programming, AI, software, hardware, electronics, Linux, cybersecurity, gadgets, and technology trends.
Is TurboGeek useful for gamers?
Yes. Gaming is one of the site’s core areas, with current material covering games, gaming technology, strategy, and industry developments.
Does TurboGeek publish programming guides?
Yes. Its technical material includes Linux, networking, microcontrollers, electronics, and other maker-oriented subjects.
Who is TurboGeek intended for?
Its audience includes gamers, technology enthusiasts, developers, makers, hobbyists, and general web users interested in practical technology information.
What makes TurboGeek different from a general technology website?
Its content combines gaming and entertainment with practical technology and maker-oriented material, giving readers several related areas to explore from one platform.
Should readers verify TurboGeek information?
For rapidly changing subjects such as software, cybersecurity, AI, and hardware, readers should check publication dates and confirm important technical details against current primary documentation.

Stay Together for the Kids: What Parents Should Consider in 2026

Anne Snyder: Biography, Career, Books, and Work in 2026

Family in ASL: A Complete Guide to American Sign Language Signs for Family

Mary Jo Campbell: The Life, Family, and Lasting Influence of the Kardashian-Jenner Matriarch

AI Design and Pictures of Editor Made Simple for Stunning Creations

Destiny Pérez: Biography, Career, Public Recognition, and Growing Influence
 Celebrity2 months ago
Mary Jo Campbell: The Life, Family, and Lasting Influence of the Kardashian-Jenner Matriarch
- Technology2 months ago
AI Design and Pictures of Editor Made Simple for Stunning Creations
- Celebrity2 months ago
Destiny Pérez: Biography, Career, Public Recognition, and Growing Influence
- Celebrity2 months ago
Seryl Kushner: The Private Life and Lasting Influence of a Prominent Family Figure
- Technology2 months ago
AlphaInnovate.com Review: Features, Pros, Cons, and What You Should Know Before Using the Platform
- Technology2 months ago
5 Simple Tricks to Prevent Wear on Your Vehicle
- Blog2 months ago
Spell Tieing or Tying: Which Is Correct? Complete Grammar and Spelling Guide (2026)
- Blog2 months ago
Friday in Spanish: Meaning, Pronunciation, Usage, and Cultural Importance